
Understanding roof types and materials (e.g., pitched vs. flat, shingles vs. metal) is crucial for new construction projects, dictating structural integrity, aesthetics, durability, and maintenance costs. Accurate measurement and design are essential steps, followed by a meticulous roof installation process involving preparation, underlayment, flashing, material application, and finishing touches like ridge caps and insulation. Specialized tools and safe practices ensure effectiveness and precision. Proper ventilation and drainage systems guard against temperature extremes and water damage. Incorporating crucial components like flashing and counterflashing prevents moisture intrusion and structural issues. Avoiding common mistakes, such as inaccurate measurements or inadequate ventilation, is key to a successful roof installation. A final inspection guarantees quality and ensures the new roof meets industry standards for long-term protection.
Roof installation is a critical aspect of new construction, demanding careful consideration and expert execution. As you embark on building your dream home, understanding roof types, material options, and the installation process is essential for a durable and aesthetically pleasing finish. This comprehensive guide delves into every step of roof installation, from material selection to ensuring proper ventilation and avoiding common mistakes. By the end, you’ll be equipped with the knowledge to navigate this vital component of your new construction project.
Understanding Roof Types for New Construction

When embarking on new construction, understanding roof types is a crucial step in the roof installation process. There are various options available, each with its unique characteristics and benefits, ranging from traditional pitched roofs to modern flat roofing systems. The choice largely depends on architectural design, climate considerations, and personal aesthetic preferences.
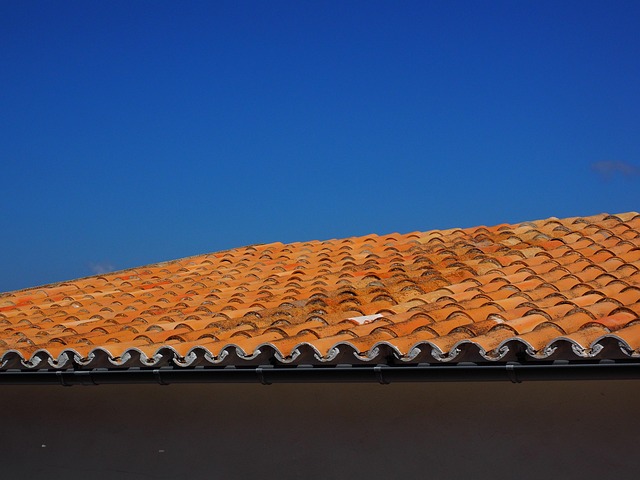
For instance, pitched roofs are common in residential construction, offering excellent drainage and a classic, timeless look. On the other hand, flat roofs have gained popularity in commercial buildings due to their low-slope design, ease of maintenance, and ability to accommodate green spaces or solar panels. Knowing these variations enables homeowners and builders to make informed decisions, ensuring the selected roof type aligns with both structural integrity and long-term functionality during the installation process.
Material Selection: Shingles, Metal, or Flat Roofs?

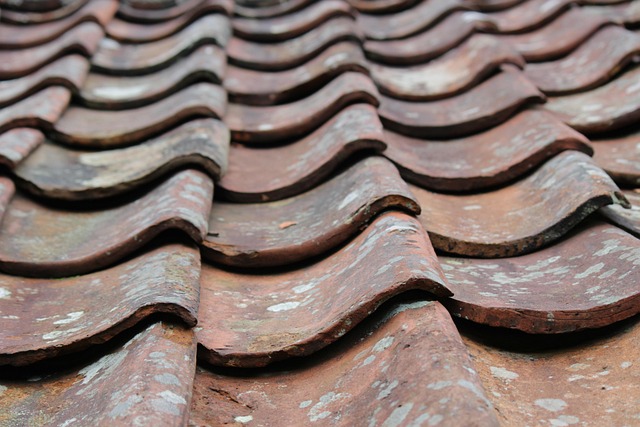
When considering roof installation for new construction, material selection is a pivotal decision that impacts durability, aesthetics, and long-term maintenance costs. The most common options include shingles, metal, or flat roofs—each offering unique benefits tailored to different architectural styles and climate considerations. Shingles remain the popular choice due to their affordability and versatility, suitable for various pitched roofs and available in diverse colors and textures.
Metal roofing has gained traction for its superior strength and longevity, particularly in regions prone to harsh weather conditions. This option is known for its excellent wind resistance and low maintenance requirements. Conversely, flat roofs are ideal for modern, minimalist designs, offering seamless integration with contemporary architecture. They require specialized installation techniques and specific materials, such as EPDM or TPO membranes, to ensure water tightness and prevent leaks.
Measuring and Designing Your New Roof
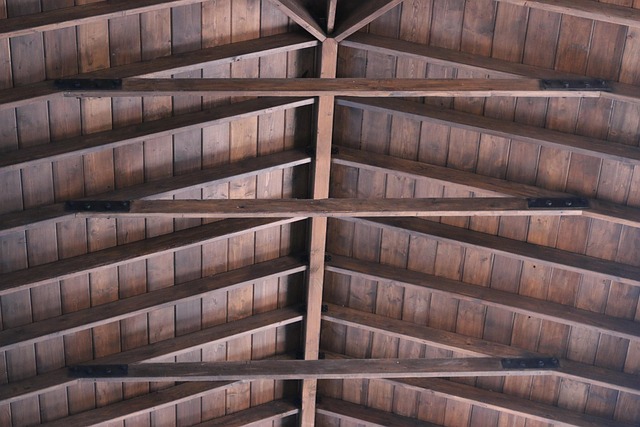
When planning a new construction project, accurately measuring and designing your roof is a crucial step in the roof installation process. It ensures that your structure is secure and aesthetically pleasing. Start by assessing the size and shape of your building to determine the appropriate roof pitch and style. Consider factors like local climate conditions, as well as architectural design preferences, to select a roofing system that’s both functional and attractive.
Next, create detailed plans or blueprints incorporating specific measurements for each component—from the overall roof footprint to individual rafter dimensions. This meticulous planning facilitates precise material ordering and efficient on-site assembly during the actual roof installation.
Installation Process Step-by-Step

The roof installation process for new construction involves several meticulous steps to ensure a sturdy and durable structure. It begins with preparing the roof deck, which includes checking for level and ensuring proper support. Contractors then install underlayment, serving as a protective barrier between the shingles and the deck, followed by flashing around chimneys, vents, and other penetrations to prevent water seepage. Next, they lay out the roofing material—either asphalt shingles or metal panels—in a specific pattern, securing them with nails or screws. This step requires careful alignment and overlap for both aesthetic appeal and structural integrity. Finally, after installing ridge caps and adding insulation, the process culminates in a thorough inspection to guarantee the new roof meets safety standards and provides reliable protection against the elements.
Tools and Equipment Required for Roof Installation

Roof installation is a complex process that requires a variety of specialized tools and equipment. Before beginning any roof installation project, ensure you have all necessary materials to complete the job safely and effectively. Essential tools include ladders, safety gear like hard hats and eye protection, measuring tape, levels, and roofing nails or screws. Additionally, you’ll need a roof underlayment, shingles or tiles, flashing for joints and vents, and an array of hand tools such as hammer, shovels, and shears.
Power tools like circular saws, nailers, and staple guns can significantly speed up installation but require proper training to operate safely. In the world of roof installation, having the right tools is a game-changer; it ensures precision, efficiency, and ultimately, a durable and secure roof for new construction projects.
Ensuring Proper Roof Ventilation and Drainage
Proper roof ventilation and drainage are essential components of any successful roof installation. Adequate ventilation helps regulate indoor temperatures, preventing excessive heat buildup and ensuring optimal air quality within the home. It also plays a crucial role in moisture control, as proper airflow reduces the risk of condensation and mold growth. During new construction, it’s vital to incorporate adequate venting systems, such as soffit vents or ridge vents, strategically placed to facilitate continuous airflow throughout the roof cavity.
Effective drainage is equally critical. Sloped roofs are designed to direct rainwater away from the building’s foundation, and proper flashing and gutter installation ensure that water is channeled efficiently. Regular inspection and maintenance of these drainage systems are necessary to prevent clogs and water damage. By addressing ventilation and drainage during roof installation, homeowners can look forward to a durable, long-lasting roofing system that protects their investment from the elements.
Flashing and Counterflashing: The Often Overlooked Components

When it comes to roof installation for new construction, flashing and counterflashing are essential components often overlooked by homeowners and even some contractors. These metal pieces act as barriers between your roof and walls, protecting against water intrusion at points like valleys, chimneys, and other penetrations. Properly installed flashing ensures that rainwater cannot seep into joints or cracks, leading to moisture damage and potential structural issues over time.
Counterflashing complements flashing by providing an extra layer of protection where the roof meets the vertical surfaces of a building. It’s crucial for maintaining the integrity of your roof system, especially in areas prone to heavy rainfall or snowmelt. By addressing these details during new construction, homeowners can avoid costly repairs down the line, ensuring their roofs stand strong against the elements.
Common Mistakes to Avoid During Installation
When undertaking a roof installation for new construction, it’s crucial to stay clear of common pitfalls that can lead to costly repairs and structural issues down the line. One major mistake is not properly measuring the roof area, which can result in incorrect material quantities and an incomplete job. Always double-check measurements before ordering materials.
Another frequent error is neglecting adequate ventilation. Insufficient ventilation can cause excessive heat buildup, leading to damage of roofing materials and reduced lifespan of the entire roof system. Ensure proper ventilation is designed into the structure, following recommended guidelines for airflow. Additionally, DIY enthusiasts should avoid attempting complex roof installations without professional guidance, as errors in technique or safety violations can compromise the integrity of the roof.
Final Inspection: Checking Quality Assurance
After completing the roof installation, a final inspection is crucial to ensure quality assurance. This step involves a thorough examination of every aspect of the newly installed roof, from the underlayment to the shingles or tiles, and from the flashing to the gutters. It’s an opportunity to catch any potential issues early on, ensuring that the roof not only meets but exceeds industry standards.
During this inspection, professionals look for proper sealing, alignment, and ventilation. They verify that all components are securely fastened and in optimal condition. This meticulous process guarantees that the roof is ready to withstand various weather conditions, offering long-lasting protection for the structure below.